5 Best Mirage Utility Line-ups For Counter-Strike 2
| Tags: CS2
| Author The Old One

Here is a list of 5 very useful Mirage utility line-ups for Counter-Strike 2
One of the most played maps in both professional and casual communities in CS:GO is Mirage. It is adored by almost every fan of the franchise. Due to its brilliant mixture of raw aim and strategic elements, the map invites a fun time for whoever plays it. The balance between the Terrorists and Counter-Terrorists for this map is also in a decent state. A game on this map can be turned around at any stage, keeping things interesting for the players. An interesting fact about this map is that since its release in CS:GO, it has been played in every single major ever. This is enough to show how close to the heart the Moroccan-themed map is to the Counter-Strike Community.
As Valve has recently released CS2 and added Mirage, the players have begun to brainstorm ways to recover the old line-ups that made the map so entertaining to play. Due to the map being reworked and improved graphically, the utility line-ups developed over the years have become unusable. So the community is working to bring back old standard line-ups and also discover new ones to evolve the strategic aspect of the map.
So we are bringing you five of the best utility line-ups for Mirage in CS2. Make sure you also check out our other articles regarding Mirage to help your performance even more.
Five Best Mirage Utility Line-ups
As Mirage depends on both tactical utility plays and raw aim mechanics, it is important to do some line-ups in your head to help out your teammates or even yourself in certain situations. These plays can make certain Circumstances more advantageous. They also give an overall tactical edge over the opponents. So let’s take a look at the five best line-ups that we have compiled below:
Mega-Mid Flash
T-Apartments to Above Mid
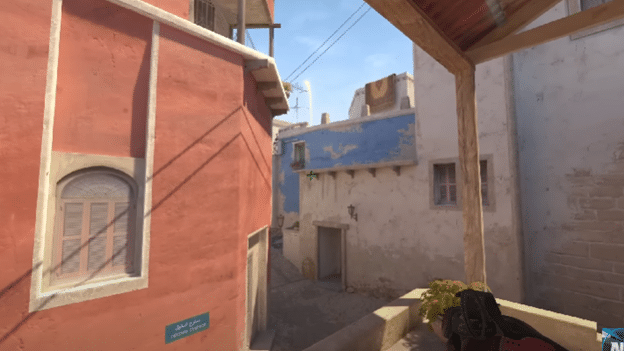
Mid is a crucial part of the map of Mirage. Due to the amount of control and access the mid-area gives to a team, both sides focus on keeping their control in this avenue. This is also why a lot of early fights happen in this region. Mid allows players to have movement room for both sites and lets rotations be much stronger. For the Terrorist Side, they will hold the opportunity to rotate around a lot faster and poke in both areas before coming to a decision.
Credits: NartOutHere
So it is crucial to take control of this area early on and both sides focus their attention here early on, regular gunfights can be very messy and risky. It is better to work the area with utility and gather info on the positioning of the enemies on both sites.
Immediate Effects
This flashbang is perfect to set up teammates ready to peak from Top-Mid and take fights against the CT side. Due to the flash being above, it overs anyone peaking mid from all available avenues. Players in Connector, Mid-Window, Underpass, Catwalk, A-Short, and other every position will be flashed. This gives the pushing players the perfect opportunity to walk out and get some kills while the enemy is vulnerable. This also allows players to create more room to move around the site with access in these Mid areas.
Available Options
- Peak Mid-Window player.
- Push Connector.
- Push Catwalk.
- Rush out to A.
- Push Window and rush A through Con and Jungle.
- Push B through Apartments and Catwalk.
Connector-Clearing Molotov and Flash
Top Mid to Connector
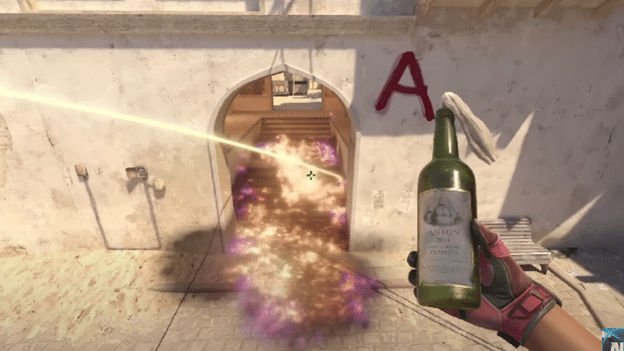
The Connector area is also very crucial for map control and is arguably the most valuable position to play in if your team dominates Mid. As it can be used to defend both the A-Site and Mid without moving much and is quite difficult to clear in a gunfight, T-sided players have a very hard time pushing and asserting themselves on Mid. So it is best advised to commit some form of utility before taking a peek inside Connector. With the utility advantage, any team can easily take away this power position from the CTs.
Credits: NartOutHere
Immediate Effects
The flash and Molotov line-ups can be used as a combo or individually. Both will be able to push back any player holding that position and give up ground. This allows the T players pushing Mid to take a fight in that region for control. It is important to note that the player in Con can peek and take out the line-up thrower, so it is advised to use early flashes to give room to the thrower and have teammates alongside to protect or trade. If done correctly these line-ups can do wonders for the T side looking to fight in Mid.
Available Options
- Push Connector to kill the player.
- Use as a distraction to push up Catwalk.
- Push out of Palace and A-Main to rush the player falling back.
- Push Mid-Windows.
Solo Pop-Flash To Push Mid-Window
Bench Under Window to Inside Window
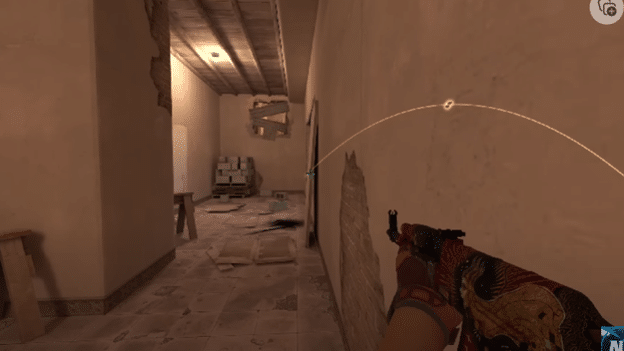
Mid-Windows is considered a stronghold for the CT side. It provides an overview of the entire Mid area and is elevated for the high-ground advantage. It allows a CT player to gain information for Mid and take fights easily due to the positional dominance. AWPers especially can find some huge impact from here. So due to the menace and value of this position, it is wise for T-players to explode into the area and take control. This will prevent CTs from accessing Windows and also give the T side an advantage.
Credits: NartOutHere
Immediate Effects
If successfully executed, the player pushed up will be able to take out any player positioned in the window, most commonly AWPers. With help from teammates in Mid or A-Main, they can organize a much more effective A-Site hit from multiple avenues.
Available Options
- Push A-Site.
- Push B-Site through Market.
- After getting a frag run out through Underpass.
- Act as bait for A-site fake.
Ladder Molotov
Bench Under Window to Inside Ladder Room
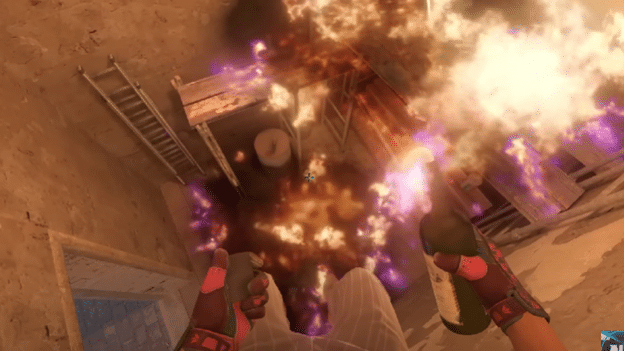
Another sneaky position for CT players is the Ladder Room. This allows CT players to hold A-Short and stop Terrorists from entering. They can also take out anyone pushing up Windows and below. Thus a huge portion of Mid and the A-Site becomes locked down. To open up this space and make sure the T-side can explore the map more easily, it is crucial to take out any threats in the Ladder Room. And as the area is very hard to clear without losing players, using utility is the best option.
Credits: NartOutHere
Immediate Effects
The Molotov will burn a large area of the room and force the player to fall back. So he will be giving loads of real estate which the T-side can take over. If timed well enough, teammates on Catwalk can push up and take out the player while he is retreating. This creates so many avenues for the Terrorists to exploit.
Available Options
- Push to A.
- Use as bait to go B.
- Fall back to confuse CTs.
- Take Window Control.
- Push CT Spawn.
Make sure you check out our ever-growing library of guides and learn some interesting strategies to help you in your next competitive game in CS2.
