5 Effective CS2 Mirage Smoke Line-ups
| Tags: CS2
| Author The Old One

Here is a list of 5 very effective CS2 Mirage smoke line-ups
As we approach another year of CS, players can look back and see the growth of CS2 after its release. From pros to casual players, the transition to the newest edition of the Counter-Strike franchise, despite having a rough start, is slowly getting to a good spot. Over the past few months, we have seen remarkable improvement in the game’s utility-based aspects. Due to the visual overhaul from CSGO, many line-ups have become ineffective. Due to experimentation and analysis of the entire player base, we can safely say that these parts of the game have greatly improved since release.
So, let’s take a look at 5 effective Mirage smoke line-ups for CS2. Make sure to check out our library on CS2 line-ups on other maps as well.
5 Effective CS2 Mirage Smoke Line-ups
Similar to maps like Inferno and Overpass, Mirage offers opportunities for both raw aim-based plays and strategic utility-based plays. Certain spots on the map are really difficult to control without any utility. The B-site requires good smoke grenade usage, especially during buy rounds, because the CT side has so many options to deny entry. There is a similar case in the A-site too. If a team wants to go for a split push, which allows a safer entry with a higher chance of success, they need to control Mid. Controlling Mid without any line-ups is nearly impossible. So it is vital to have some basic line-ups in mind while playing Mirage.
T-Spawn to Mid-Window
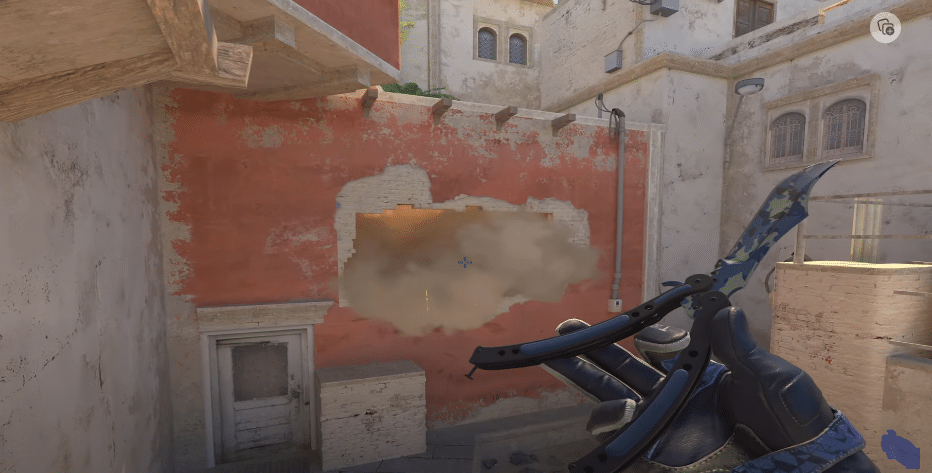
This is probably the most important smoke in all of Counter-Strike. Mid is such a vital part of Mirage and it is crucial to take control of this area before pushing towards any of the sites. Having Mid allows players to enter any bomb site through two avenues, making the push more difficult to stop. The CT side can defend Mid through many ways: B-Short, Underpass, or Connector.
Credit: CS Tactics
However, the strongest position in the Mid is Window. This place is an AWPers paradise and allows the player to easily pick off anyone pushing forward. It also has vision towards B-Short and Connector, so it can damper a split push by taking out the Mid players. Therefore it is vital to smoke this area off before pushing closer down Mid.
This smoke can be thrown all the way from T-Spawn, so if your team is looking to take control of Mid early in the round, you can follow this line-up and have an easier time accessing Mid. The only way a Window player can actually peek at you from this smoke is if they jump out of Window, just outside Underpass. However, that is a very risky move and unlikely to happen. With this smoke in place, you will have an easier time fighting Mid and pushing toward either site of your choice.
T-Spawn to Connector
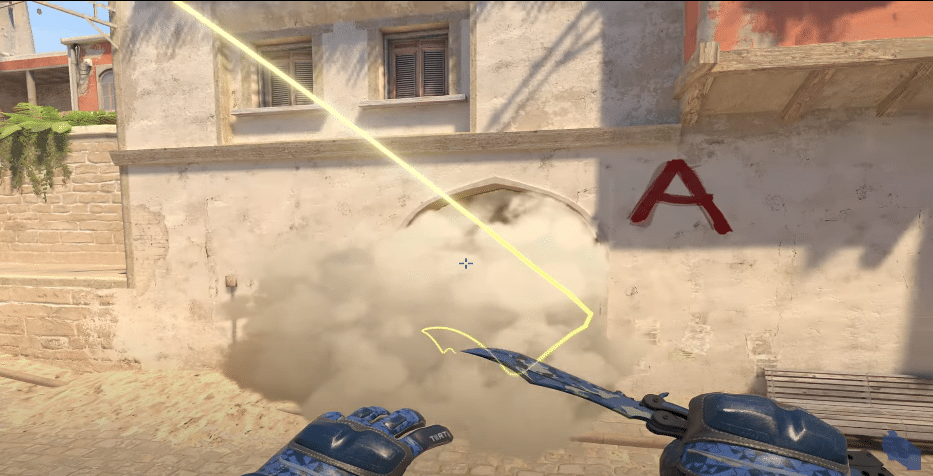
Connector is another very hard-to-fight spot in Mid. It is not as punishing as Window, but in certain scenarios, it can be very hard to spot the enemy in there. Utilities like molotovs can also be countered as Connector has an elevated platform where the player can stand to avoid getting burned.
Credit: CS Tactics
The Connector position can not only defend Mid but also during an A-Site hit, where the player can walk up near Stairs and pick off players inside the site. If you’re looking to push B through Catwalk, players can shoot at you all the way from inside A, through Connector, if it is not blocked. So it is very important to smoke this spot if you’re looking to explode onto Mid.
This line-up completely covers all of Connector. Anyone placed there won’t be able to see towards Mid at all. The only a Connector player can fight Mid is by pushing out of there, which will make it easy for anyone in Mid to take them out. This smoke will allow easier access to Catwalk or even push up towards Window. Another bonus is the fact that this line-up can be thrown from the same spot as the Window smoke so this makes it perfect for a Mid-rush or B-split-rush.
Outside Ramp to Stairs and Jungle
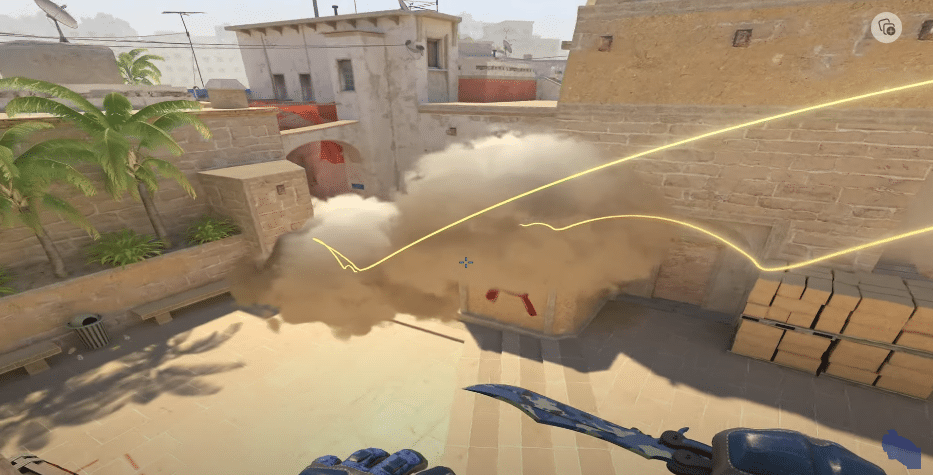
This is a two-in-one line-up, you can throw two smokes from the same spot, and one will land in front of Connector and the other on top of Stairs. These two spots are the first positions where CTs will play and attempt to deny the push to A. Initially near the A-Ramp, Stairs will be the first spot where players will shoot from. Since the angle is more advantageous to the CTs it is better to block off the spot using a smoke.
Credit: CS Tactics
Connector and Jungle come into play when a team is far deeper inside the site. These spots allow players to easily pick off anyone inside the site. Jungle is especially punishing as the AWPer posted in Window comes to Jungle to find easy shots on to the players entering the site. So it is crucial to have these spots smoked off for an easy entry.
Without the long-range support from Jungle and the high-ground coverage from Stairs, the A-site will be easy to take. Players can even throw HE Grenades and Molotovs behind the smokes to buy more time and deny any fast retake through the smoke.
Outside TV-Room to Market Window
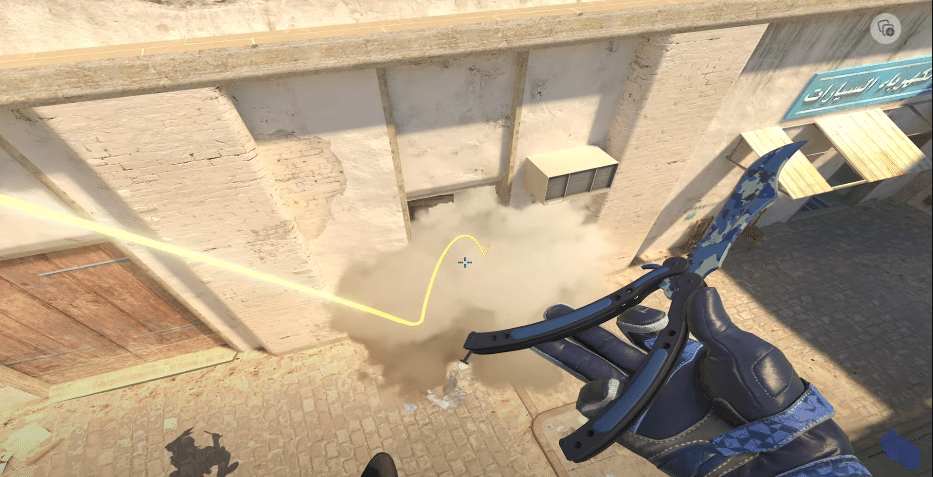
Market Window is one of the primary spots to worry about after dropping inside the B-site from Apartments. Players can see inside of the site, B-short, and Apartments from there. This allows them to get an easy kill and disrupt the bomb-plant. Considering how deep the angle is, it can be hard to shoot at and clear Market. If an AWPer positions there, the damage done can be unfathomable.
Credit: CS Tactics
This line-up can be thrown from outside of Apartments so you don’t have to worry about getting shot. It will nicely set up your teammate’s push toward B and is even close to the default B-site flash allowing you to give a lot of utility support for your team while entering in B.
Outside TV-Room to Market Door
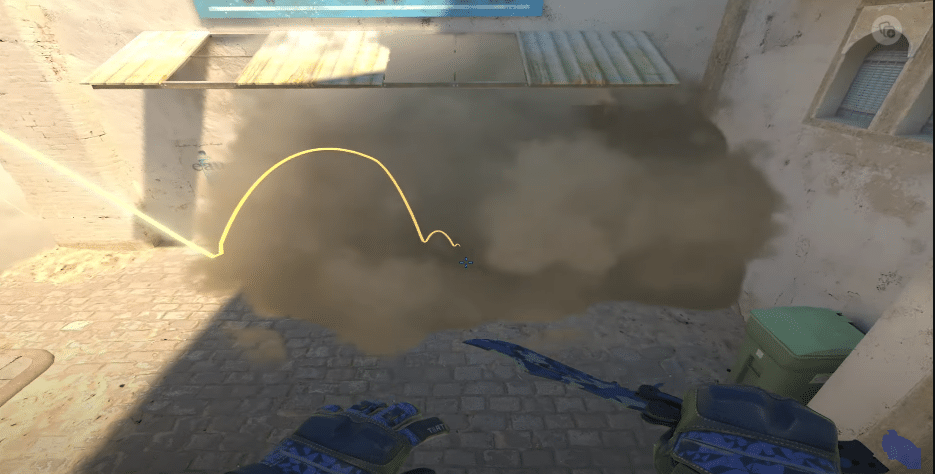
Similar to Market Window, Door holds the same danger potential and allows for Riflers to push out and deny the bomb plant. They can throw utility to deny entry and completely destroy the push.
Credit: CS Tactics
This line-up, thrown from the same spot as the Window one, can block off the entirety of Market Door and deny that possibility. Anyone inside Market will be forced to respect the smoke or push out. Pushing out will make them easy to trade whilst falling back will buy time for planting the bomb and preparing for a post-plant scenario. This smoke is a little wide and does give some room for a lurk, but a molotov behind the should be enough to deny any fast retake attempts. These two smokes to Market Window and Door pair up really well for a split-B push which requires Mid-control. Mid-control can be attained using the Connector and Mid-Window smokes mentioned earlier.
Make sure you check out our massive library of CS2 line-ups and strats for more plays to try in your games.
