Fade Best Haunt Lineups to Dominate Defense on Fracture
| Tags: Valorant
| Author thealchemist
Valorant players are scared of Fade mains using these lineups on Fracture defense
Fade is an intriguing recruit for the Valorant roster. Since her introduction, she has amassed a large fanbase among the player audience due to the practicality of her equipment. Some speculate that she could replace Sova, which is a bold assertion that cannot be dismissed effortlessly. She can perform many of the same tasks as Sova but in her unique manner. Considerable effort should be spent learning her lineups to maximize this agent’s potential. Never-before-seen Haunt lineups for Fade on Fracture defense await being discovered in this article.

Credit: Riot Games
Haunt Lineups for Early Information
It’s generally agreed that Fade’s Haunt is one of the best reconnaissance skills in the game. This utility makes the ability to rapidly and precisely locate even the most covert of dangers possible. Therefore, making the most of this agent’s capabilities is crucial. However, this usefulness comes at a cost; it can be dispatched rapidly because of its cumbersome size compared to the Sova dart. Therefore, the stronger Fade must constantly seek ways to throw off opponents by fielding unconventional lineups. Having stated that, let’s get this list rolling by introducing
A Main Info Haunt
This one is a very effective lineup for scanning the A Main region for attacking enemies and having your colleagues switch positions to give you a greater chance of holding the site. You can assist your squad at the other location if this scan has no hostiles.

Credit: Tseeky
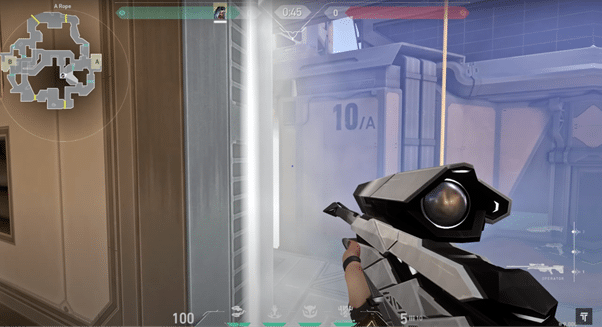
Step 1: Hug the left side of the A Rope barrier.
Credit: Tseeky
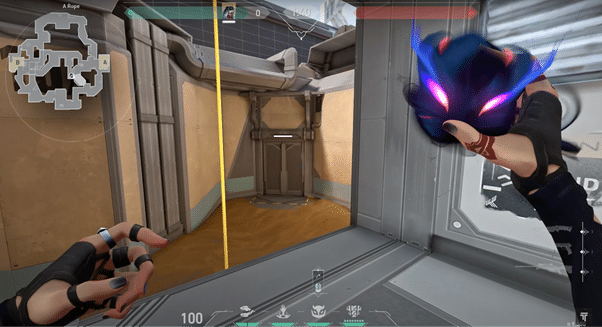
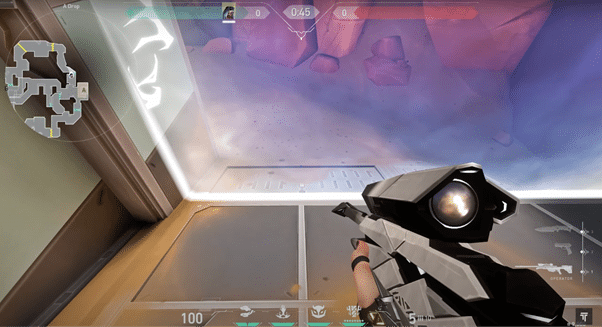
Step 2: Aim your crosshair here.
Credit: Tseeky
Step 3: Stand still and throw the Haunt for the perfect landing.
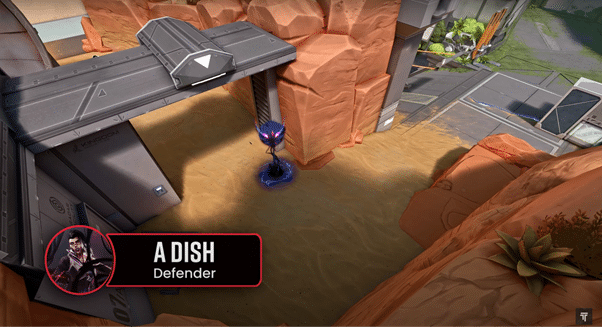
A Dish Info Haunt
The A Dish is a common area for the attackers to attack from. The fact that they can apply pressure on the defenders from A Dish and A Main gives them an added incentive to make their play from there. Therefore, as a defender, some early info on the location would greatly benefit you and your teammates.
Credit: Tseeky
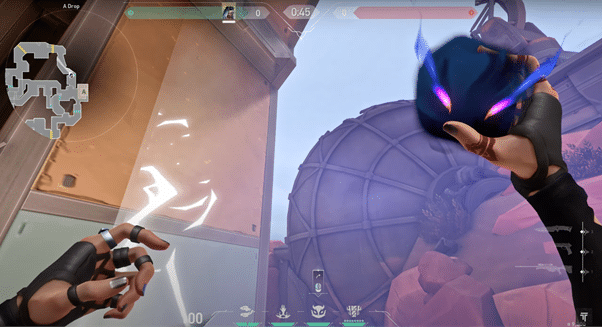
Step 1: Approach the barrier on A Drop.
Credit: Tseeky
Step 2: Line your crosshair up with this shown spot.
Credit: Tseeky
Step 3: Do a quick running jump throw.
A Sand Info Haunt
Attackers pushing A Site will try to abuse the Sand location as much as possible. Furthermore, having a defender positioned there may not be the optimal solution since he can be flashed and killed quickly. Therefore, this Fade lineup will be super valuable as attackers won’t anticipate it, giving you ample opportunity to take a few impactful kills even through smokes.
Credit: Tseeky
Step 1: Approach the wall where it shows the text “22”.
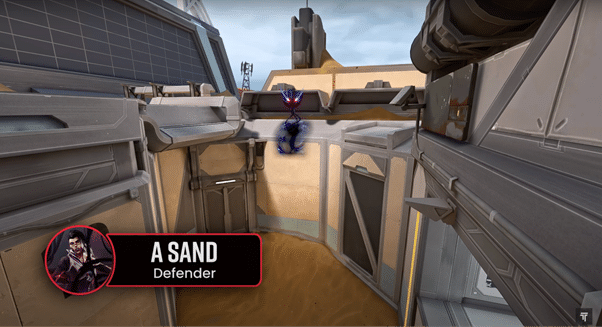
Credit: Tseeky
Step 2: Aim at the spot shown below.
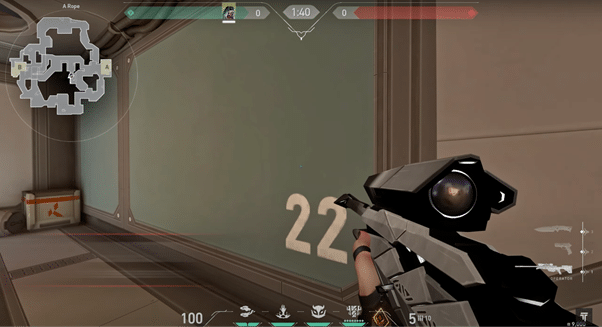
Credit: Tseeky
Step 3: Do a quick running jump throw.
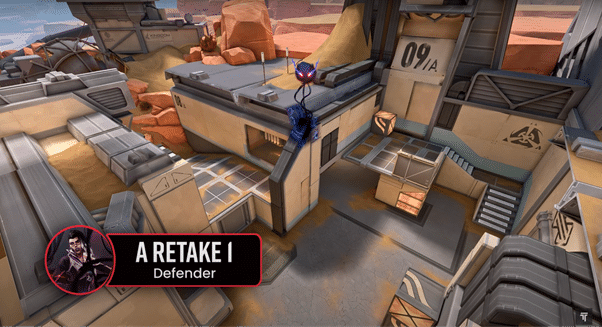
A Retake Haunt
Reclaiming the A site can be a total joy when one employs the art of Fade utility with finesse. The Haunt lineup for a retake shall prove invaluable, aiding both you and your esteemed teammates in the noble endeavor of reclaiming site control.
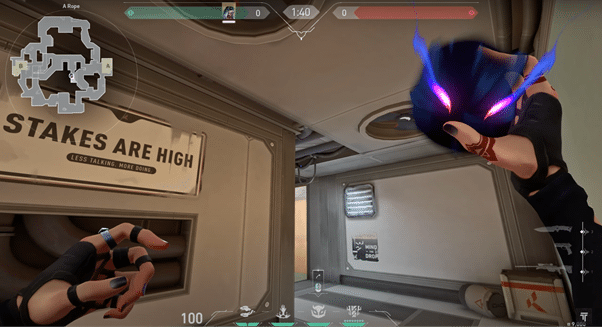
Credit: Tseeky
Step 1: Come to this spot on the defender’s side spawn. (Look at the radar to have a better understanding).
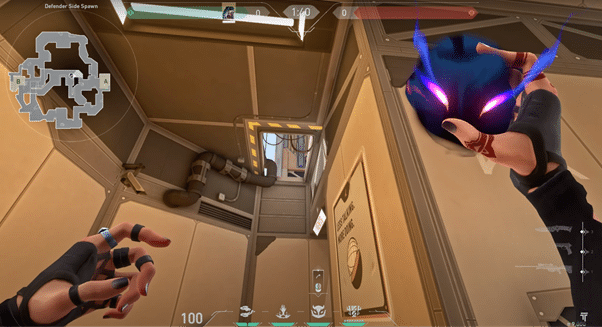
Credit: Tseeky
Step 2: Aim at this spot with your crosshair.
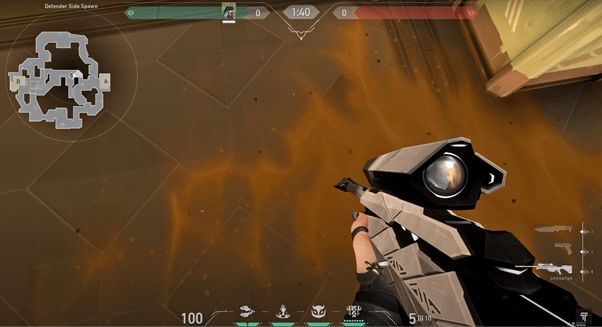
Credit: Tseeky
Step 3: Do a quick running jump throw, and your opponent staying on-site will have no choice but to admit defeat.
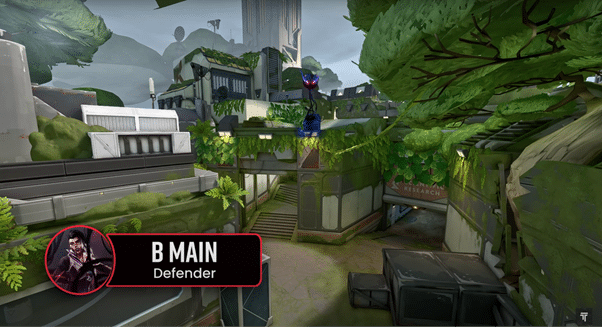
B Main Info Haunt
This is an excellent lineup for checking the B Main region for attacking enemies and having your teammates alter places to increase your chances of holding the site. If no hostiles are in this scan, you can aid your team in the other location by rotating early.
Credit: Tseeky
Step 1: Approach these boxes on the B site and get stuck between them.
Credit: Tseeky
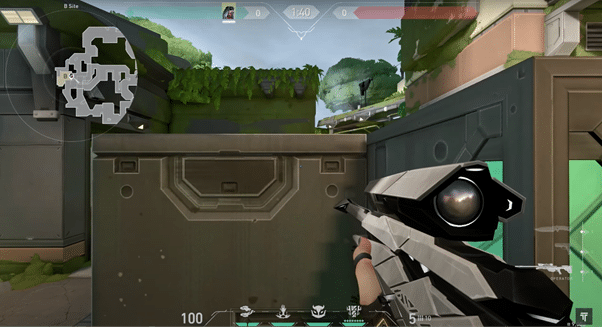
Step 2: Aim your crosshair at the shown location below.
Credit: Tseeky
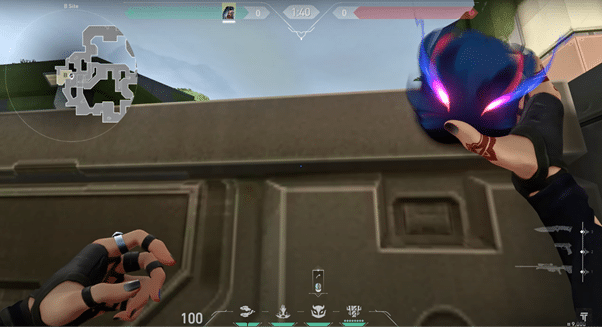
Step 3: Do a simple jump-throw, and the Haunt will scan the entire B main for attacking enemies.
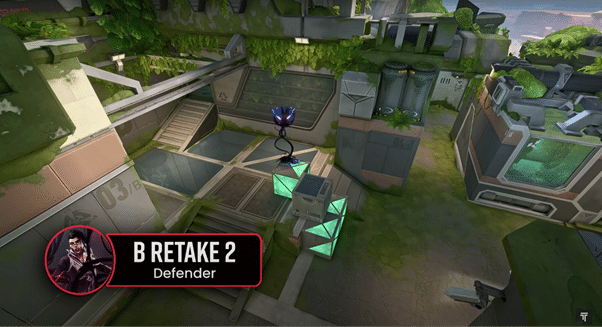
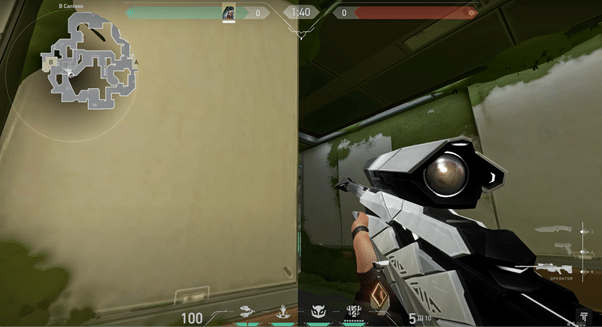
B Retake Haunt
You’ll frequently have to retake B from the opposition as a Fade player. You can help yourself and your squad immensely by using her utilities. If you want to see results in your ranked games, try this B retake lineup.
Credit: Tseeky
Step 1: Get yourself on this spot in B Canteen.
Credit: Tseeky
Step 2: Aim at this spot with your crosshair.
Credit: Tseeky
Step 3: Do a simple standing throw. The attackers on B will not see it coming, and your team will get some decent kills.
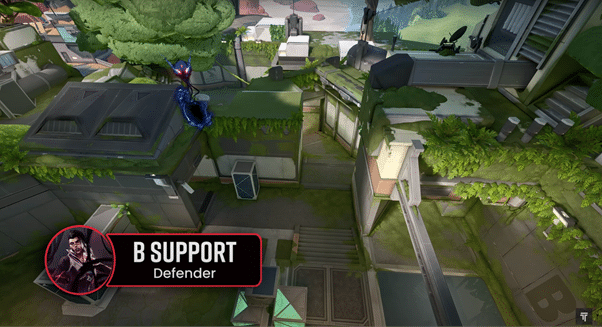
B Support Haunt
This particular lineup proves to be quite advantageous when one finds themselves strategically positioned within the B Link area or assumes the role of a rotating defender from the A site, seeking to lend a hand to teammates stationed at the B site. This remarkable utility shall quickly come before you arrive at the designated site, allowing ample time for your esteemed teammates to put down the attackers. Such is the sheer brilliance and efficacy of this exceptional lineup.

Credit: Tseeky
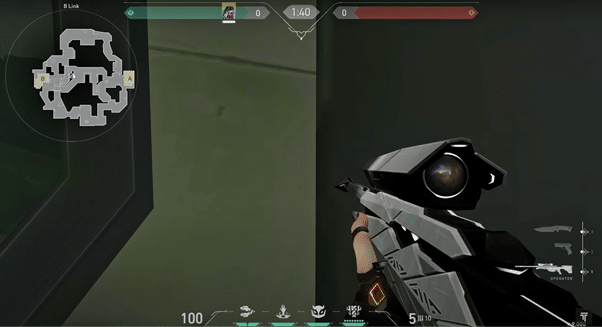
Step 1: Stuck yourself in this corner on B Link.
Credit: Tseeky
Step 2: Line your crosshair up at this spot.
Credit: Tseeky
Step 3: Do a simple jump throw, and it’ll land to provide plenty of support to your allies.
For more highly efficient Valorant Fade guides, stay with ESTNN.