Final Fantasy 16: How to Defeat Knight of the Dying Sun
|
| Author Diana D'Estefano

In the main mission “The Hunter and the Hunted” of Final Fantasy 16, the boss Knight of the Dying Sun appears after Garuda has been vanquished. You need to be able to think clearly, rapidly, and quickly if you want to beat the Knight of the Dying Sun. You must focus on him and develop patience if you wish to defeat his incredible strength and intelligence. In this article, we’ll provide you with some tips and tricks to help you beat this challenging boss and continue the game.
Location, rewards, and abilities
The main quest “The Hunter and the Hunted,” which is accessible there, leads to the encounter with the Knight of the Dying Sun boss in the Holy Empire of Sanbreque’s The Kingsfall zone. In addition, as a reward for their dedication and hard effort, players will receive 2500 Gil, 448 XP to aid them in their quest, and 120 AP as further incentives. Rewards like Wyrrite, Meteorite, Bloody Hide, and Imperial Link are also available.
But it is important to keep in mind that Knight of the Dying Sun is not to be taken lightly. It is crucial to have a sound strategy in place because this fierce adversary can cause issues for anyone who attempts to engage him. As you battle this enemy, keep in mind that Knight of the Dying Sun, like Clive, has a variety of unique abilities to use, such as Jump, Double Jump, and Mirage Dive, all of which do extra damage to his foes.
How to defeat Knight of the Dying Sun
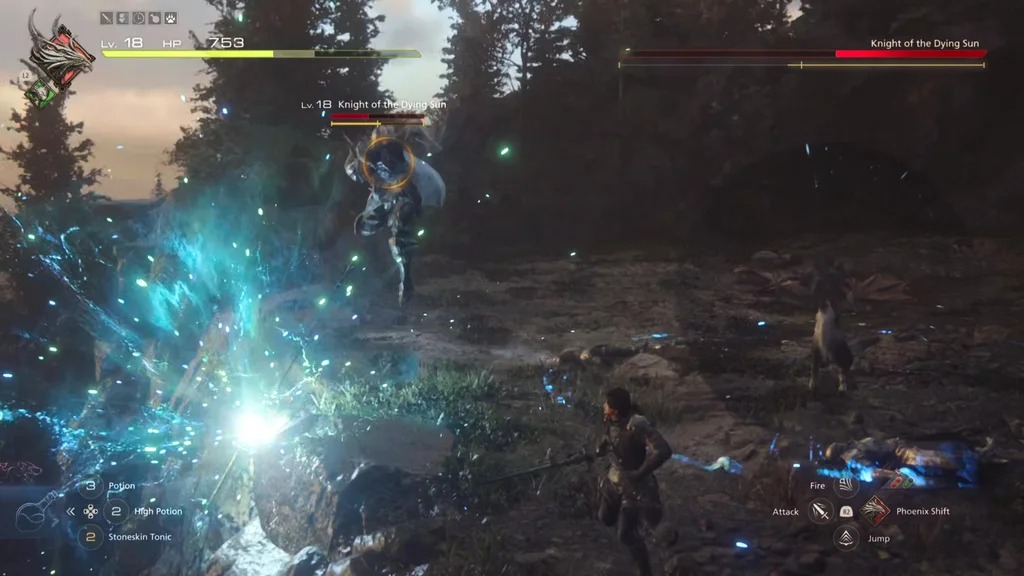
The key to defeating the Knight of the Dying Sun is to parry his basic sword attacks and avoid his combination attacks. Once you become familiar with his attack patterns, you’ll see that he shares many of the same skills and maneuvers with the Knight of the Blinding Dawn. You can wait and employ ranged attacks first until you understand the boss’ motions if you are unfamiliar with the latter’s boss mechanics. The Knight will typically assault you in a series of close-ranged melee blows with minimal breaks in between. Wait for the final combo to start before timing a precise dodge and counterattacking him after.
The Knight of the Dying Sun will use strong elemental assaults as the fight goes on. Be ready to modify your strategy as necessary. As soon as he begins to channel his fire blast, rapidly takes cover behind one of the pillars positioned throughout the arena to deflect the attack’s main force. Take advantage of this chance to fire a long-range attack, or, if you have the talents, cast a deadly spell to momentarily knock him out.
Keep in mind that the Knight becomes weak following some assaults, providing a chance for a critical hit. Keep an eye out for instances when he overextends himself or makes a risky move that exposes him briefly. Take advantage of these chances to launch a flurry of potent melee attacks, increasing the amount of damage you do. Keep in mind to stay energized throughout the battle. Running out of energy can leave you susceptible to the Knight’s continuous onslaught because dodging and parrying need exact timing. To ensure that you can react quickly to each attack, plan your evasions properly and effectively use your stamina reserves.
The Knight of the Dying Sun could become crazy as the fight nears its conclusion, speeding up and becoming more aggressive. Keep your mind on the task at hand and be calm. Maintain your avoidance of his combos and profit from his weaknesses. The most perilous part of the war is now, yet it is also the part where success is almost within reach.
Knight of the Dying Sun’s abilities
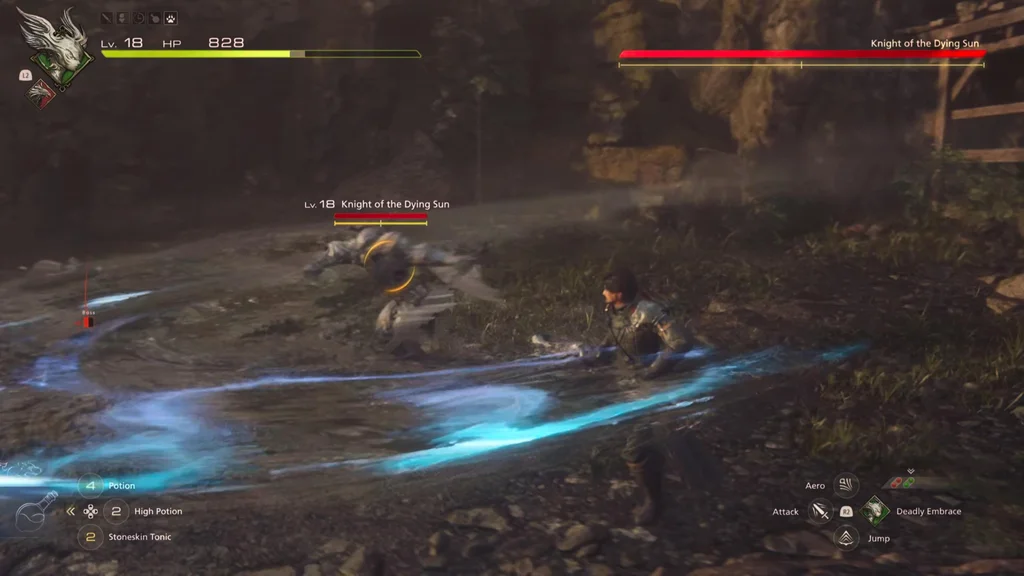
The blue markers on the floor are where the Knight will land when he leaps into the air, so keep away from them. He will start doing the double jump, or the Double Jump ability, as the fight progresses. During the initial jump, you can use the left stick to quickly move aside so that you are clear of the approaching landing area. Utilize the Dodge Button (R1) after the second jump to do a quick dodge that will allow you to evade his landing and any potential harm.
The Knight will fall to the ground and be momentarily stunned while he takes some time to recover. Your Eikon skills, such as the Gouge and Rising Flames, are the ideal choice for being used at this time. He is vulnerable, so you can take advantage of it by using the full force of your Eikon to strike him.
Be ready for the Knight’s sophisticated move known as the Mirage Dive. It is difficult to predict where he will move because, during this attack, he will quickly drop down on various areas throughout the arena. To avoid the various blue markers that identify his landing locations, remain vigilant and move forward. To reduce your danger of suffering damage as you move about the battlefield, pay attention to where you are in the field of combat and keep a safe distance from these markers.
In spite of this, take care when avoiding the Knight’s Mirage Dive because there’s a minor possibility that he might alter his landing location in response to your movements. Maintain your agility and be prepared to modify your evasive actions if you see him shifting his trajectory while you are in the dive. To survive this stage of the conflict, one must constantly be on the lookout and adaptable.
Don’t forget to use whatever defensive or healing tools you have to keep yourself alive during tense battles. Keep an eye on your health and be ready to utilize healing items or spells as needed. You can keep your lead and go closer to victory by properly managing your resources and remaining focused.
